Guest Blogger: $14 Modern Ruffled Table Runner
This runner is easy to create and customize for your wedding. These could be used on all the guest tables or just on the special tables.
Burlap Base
For this tutorial, there are three different versions I’m going to show you:
- Sew version - using a sewing machine (what I did);
- Semi-sew version – using stitch witchery or no-sew hemming;
- No-sew version – just cut and go. I will add the special no-sew instructions in italics.
Begin by measuring the length of your table. Mine is 79″ long.
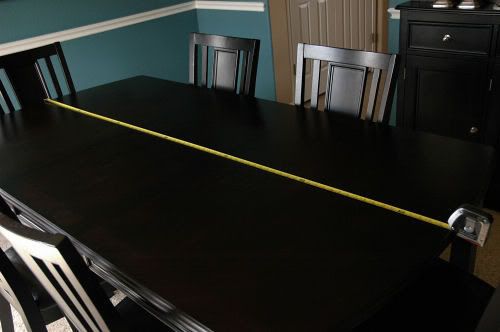
Next, you will need to figure out the dimensions of your runner. I generally like my runner to overhang the length of the table by 6-8″ on each side. I personally think that runners that only overhang a few inches or don’t overhang at all look a little anorexic, but that’s just me. Runners are also generally 14-18″ in width, but again, choose what works for your table.
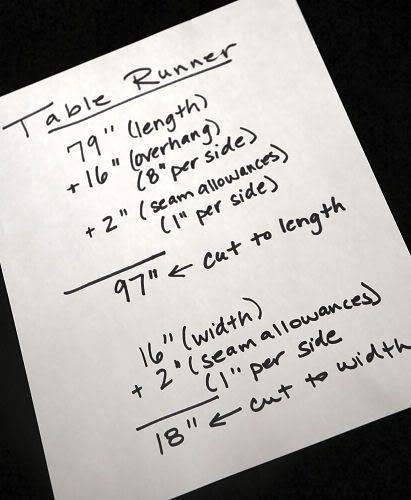
Because I’m one of those people who likes to see everything in writing, I wrote out my dimensions to use for cutting the burlap. If you are going to create the sew or semi-sew version of the runner, be sure to add in the 2″seam allowances as I did.
If you are going to create the no-sew version, leave the 2″ seam allowances out of your calculations.
Are you following me?
If you don’t already have a stash of burlap on hand, head to a fabric store and pick some up. It’s generally less than $3/yard. For my runner, I needed about 2 1/4 yards. Burlap comes in an array of colors – white, black, natural, red, orange – so choose what works best for your decor.
Once you are home with your burlap, throw it in the washer and dryer if you are doing the sew or semi-sew version.
If you are doing the no-sew version, do not wash it now. We’ll do that in a bit.
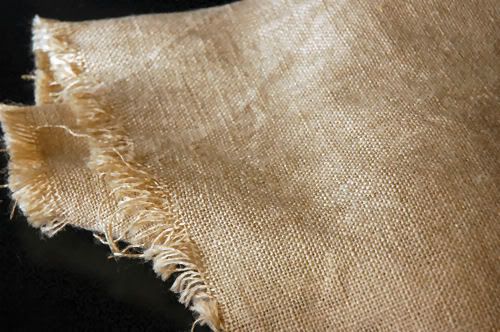
Now we’re ready to cut. Spread out your burlap on the floor and use a yard stick or tape measure to mark of your dimensions you calculated earlier. Follow the weave of the burlap to cut your lines as straight as possible. If you have already washed your burlap, go ahead and cut off the frayed selvage edges before you cut out your runner.
For the no-sew variety, now all you have to do is fray your edges! Throw your cut piece into the washer and dryer to soften the fabric and fray the edges. When it’s dry, or almost dry, iron the piece on a high setting and place on your table. Congrats! You’re finished!
For the sew and semi-sew varieties, fold under each edge 1/2″ and press. Repeat by folding under each edge 1/2″ again and press. I generally like to do the double folds on the long sides first and then the short sides so that I end up with nice square corners.
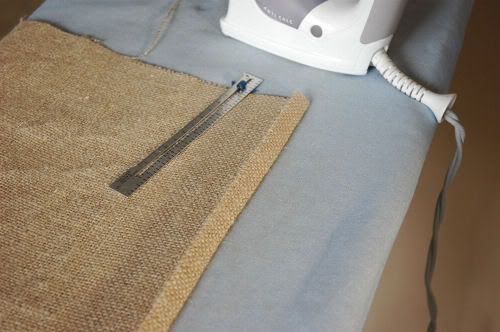
Now you can either add a strip of stitch witchery underneath the folds and iron it according to the directions on the package or you can run it through the sewing machine, as I did mine.
Ruffled Top
1. Buy some fabric that’s about two and a half times the length of your runner. Your measurements will be different, but my runner was about 80 inches long, so I needed a length of fabric that was about 5 yards long. I bought 3 yards of cheap quilting cotton ($3.99 “Symphony Broadcloth” at JoAnn’s, made cheaper by a 40% off coupon) and sewed two lengths of it together. You want to cut the length
WITH
the selvedge edge,
not
against
. This ensures your ruffles will be nice and full.

2. You want the finished width of the new piece to be about 2 1/2 inches shorter on each side than the width of the burlap runner. Again, your measurements will be different, but my runner is 18 inches wide so I wanted my finished width of the new piece to be 13 inches wide. Add a 1 inch seam allowance on each side, which makes what I call my “cut to width” 15 inches wide.
3. Set up your sewing machine to stitch a long basting stitch with a loose-ish thread tension (mine was set to a 4). At about 5/8 of an inch from the long edges of your fabric, run your basting stitch, catching the fabric behind the foot so that it gathers. Hold it for as long as you can, and then let go and hold the next length. Do this for both of the long edges, and leave long thread tails (about 6 inches long) hanging off both ends on each side. You’ll leave the basting stitches in for this project, so you may want to choose a thread color that matches the fabric.

4. Head to your ironing board and press your new ruffles so they become folds. I’m sure this kind of ruffle has a fancy name, but I’m going to just call them modern ruffles. You don’t want them to look uniform, so it’s perfectly fine (and even preferred) to have creases and the folds going in different directions.

5. Lay out your burlap runner and place your new runner on top of it. Pull the fabric down the basting stitches (using the 6 inch tails if you need to) so that the new fabric is a few inches longer than the burlap.
DON’T
pull the basting stitches out.

6. Turn the basted edges under 1 inch and pin into place. I used a lot of pins to make sure that I got it all turned under and no ruffled poofs where hanging out. Because you placed your basting stitch at 5/8 inch, it will be hidden when you make you turn the edges under.

7. Go back to your ironing board and press the new fold on the edges that you turned under. I left the pins in place – just don’t iron over them if they have plastic heads.
8. Lay your new piece of fabric back out on the burlap and pin it into place. I pinned it down on both long edges and a few times down the middle. Stitch it down about 1/4 of an inch from the edge of the new fabric. However, since the edge of your fabric is now folded gathers, your edge won’t be completely straight and even. Your stitch will even make the fabric pinch and fold. I’m sure that professional seamstresses will hyperventilate over that, but it’s totally fine (and again, preferred) for this project
.

9. Visit your ironing board again and turn under the parts of your fabric that you let overhang the ends of the burlap. If it’s more than about an inch or so, you may want to trim it. Just turn it under the burlap, pin it, press it, and then stitch it in place.

Now you’ve got yourself a nice set of modern ruffles on a great burlap table runner. I absolutely love the look of this updated version.


Lindsay Ballard authors the popular DIY home decor blog Living With Lindsay . She strives to help her readers easily create vibrant spaces that combine individual family needs with an eclectic flair.
